Why Modding Matters: The Ultimate Game Boy Experience
Nintendo’s retro revival has focused mostly on home consoles, leaving behind the portable consoles that carried the brand through ups and downs. Fortunately, enthusiasts have kept the Game Boy legacy alive, offering modding and repair options that make the Game Boy as good as new—or even better.
If you’re ready to revive your Game Boy for a modern experience, here’s how to bring it back to life with repairs, cleaning, and advanced mods like adding a backlight.
Essential Repairs and Maintenance for Your Game Boy
Before diving into modifications, it’s wise to start with basic repairs and maintenance. These old handhelds can collect dust, dirt, and corrosion that make them unresponsive or unpleasant to use. With some simple tools and a bit of patience, you can make your Game Boy look and play like new.
Basic Tools and Parts
To disassemble your Game Boy, you’ll need:
- Phillips head and tri-wing screwdrivers
- A cleaning brush or cloth
- Replacement shells, buttons, or screen covers if necessary
Most replacement parts, including cases, button kits, and lenses, are readily available online for a modest price, often in standard and custom colors to personalize your console.
Cleaning and Restoring Button Sensitivity
Buttons can lose their responsiveness over time, often due to grime build-up. To fix this:
- Disassemble the Game Boy to access the buttons and contacts.
- Clean the plastic buttons with soapy water and scrub away any dirt.
- Use a cloth to clean the rubber button pads and gold contacts on the motherboard, which are responsible for registering button presses.
Regular maintenance can ensure your Game Boy feels as responsive as when it first launched, and it’s a rewarding process for any nostalgic gamer.
Advanced Modding: Installing a Backlight
The original Game Boy Advance’s biggest flaw was its lack of a backlight, making it challenging to see games clearly. While the GBA SP introduced a front-lit screen, many fans prefer the original GBA’s wider layout and comfortable controls. Installing a backlight can bring the best of both worlds.
Step-by-Step Backlight Installation for Game Boy Advance
To add a backlight to your GBA, you’ll need:
- A backlight screen kit (available online)
- An adapter cable specific to your GBA model
- A soldering iron (for brightness boost)
Choosing the Right Adapter: Open the battery cover and check the model number on your GBA’s motherboard. If it starts with a 1, you’ll need a 32-pin adapter. If it starts with a 0, you’ll need a 40-pin adapter.
Installation Tips:
- Follow the instructions provided with your backlight kit, ensuring a clean connection between the screen and the motherboard.
- If using a brightness boost, solder the red wire from the ribbon cable to the motherboard.
- Trim the plastic casing around the screen area if needed to accommodate the backlight.
If you’re new to soldering, there are pre-modded Game Boys available on sites like eBay and Etsy. These come in various colors and designs, perfect for those who want a ready-made retro gaming device.
The Nostalgia and Rhythm of Old School Gaming
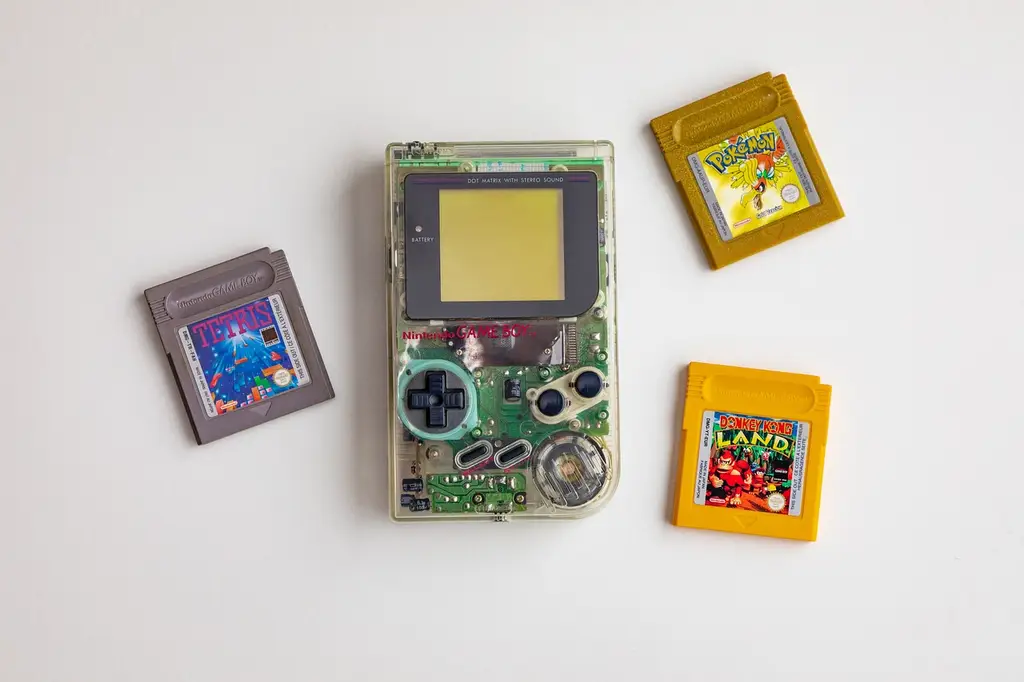
There’s something comforting about the tactile experience of using a Game Boy: popping off the battery cover, sliding in fresh AA batteries, and clicking in your favorite cartridge. Unlike today’s gaming consoles, there are no updates, no menus, and no distractions—just pure gaming.
Modding a Game Boy is more than just a hobby; it’s a way to preserve gaming history and reconnect with the past. Whether you’re restoring a classic or adding a backlight for late-night play, the journey offers a renewed appreciation for a timeless gaming icon.
So dust off that old Game Boy, grab your tools, and start your journey down memory lane—bringing a piece of retro tech into the modern age, one upgrade at a time.